The Diesel Jeep
Jeep Grand Cherokee Diesel Conversion
This web page is about the conversion of a 1993 Jeep Grand Cherokee to run on diesel or other oils. The process started because I had a 1993 Grand Cherokee that needed an engine and front differential, and I had a Chevrolet pickup I bought to use the 6.2l diesel engine for another truck, my K3500 which I ended up putting in a brand new Peninsular 18:1 GEP engine.
Since I had the Grand Cherokee and the 6.2l diesel engine, 700R4 transmission and other miscellaneous parts I decided to try and mate the two together for a vehicle that would get decent fuel mileage and could run on any fuel similar to diesel, and add a vegetable oil system in the future. I wanted to try and use most of the major parts I had around and make this a "budget build". First thing was to pull the engines and see if the 6.2l would even fit. It does fit, but it is tight. There is plus or minus a 1/2" between the firewall and the engine and the frame rails and the exhaust manifolds and the power steering pulley and the steering gear box.
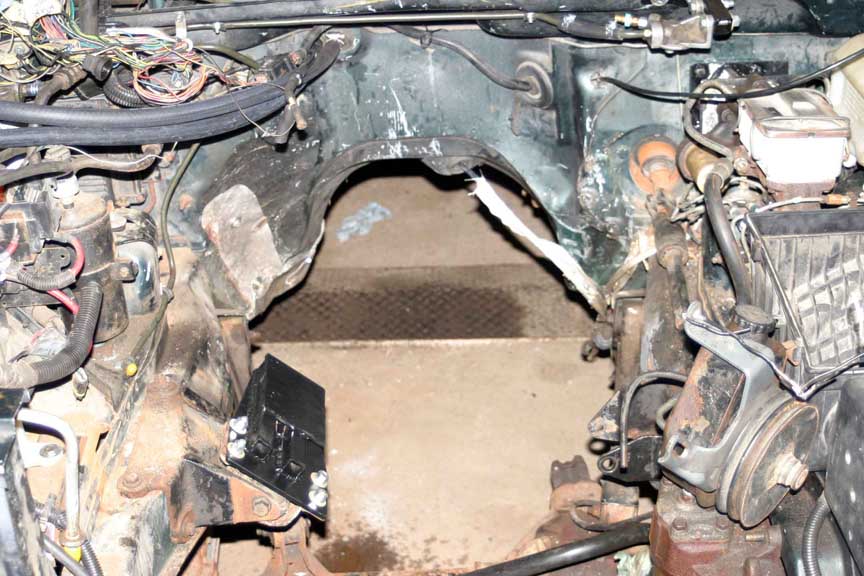 I had to massage the fire wall a little on both sides to provide clearance for the engine. The passenger side needed clearance for the exhaust and the driver side needed clearance for the oil cooler line port. The process would have been much easier if I had made some custom exhaust manifolds, but I want to use what I had. With the engine in place it appears I can still service the glow plugs.
So far the engine mounts have been the hardest part of the conversion. The 5.2 Jeep engine is mounted toward the front of the block to allow clearance for the upper control/radius arms for the solid coil sprung front axle. First I ordered the small block engine mount kit from Novak, but once I got the kit here, I realized that I could not make it work, so those went on the shelf for a future project. I fabbed a new engine mount out of some 3/16" plate and some square stock to move the mounts forward. I took the frame mounts off the Chevrolet pick up, trimmed each down and bolted them in place of the Jeep mounts. The flat plates bolted to the block then bolted to the flat part with 4 bolts to the upside down Chevrolet frame mounts. The photos shows the right engine mount and the firewall massaging and an added heat shield.
The braking system was modified with a hydro boost, master cylinder and distribution block system out of a Chevrolet diesel van. The rod coming of the hydro boost was longer than the vacuum assist on the Jeep, so I made a mount out of some flat stock and 3" square stock, to move the whole system forward and down to line up with the pedal. I cut one large hole in the middle of the flat stock on each end so the rod would fit through, 4 holes on the outside perimeter to match each of the Jeep and hydro-boost mounting surfaces and then welded the 3" square stock between the two pieces of flat stock. See the photo. I had to make a small bushing where the rod attached to the pedal. I made some custom lines to the distribution block and then to the existing brake line on the jeep. I had to buy some metric to standard adapters to connect the Jeeps hard lines to the distribution block. I will update how this brake system works once this vehicle is on the road.
The fittings from the power steering pump fit the fittings on the Jeep box. I carefully rebent the Chevrolet pickup truck hydraulic lines to fit as needed. I may have some new lines that fit better made up at a later date, but these seem to fit OK and are presently not in the way of anything else, but could be made shorter and fit better, but this is a budget build. The power steering belt is one size shorter than the recommend size as I wanted to make sure there was enough clearance between the pump and the power steering box as that was one area with little room.
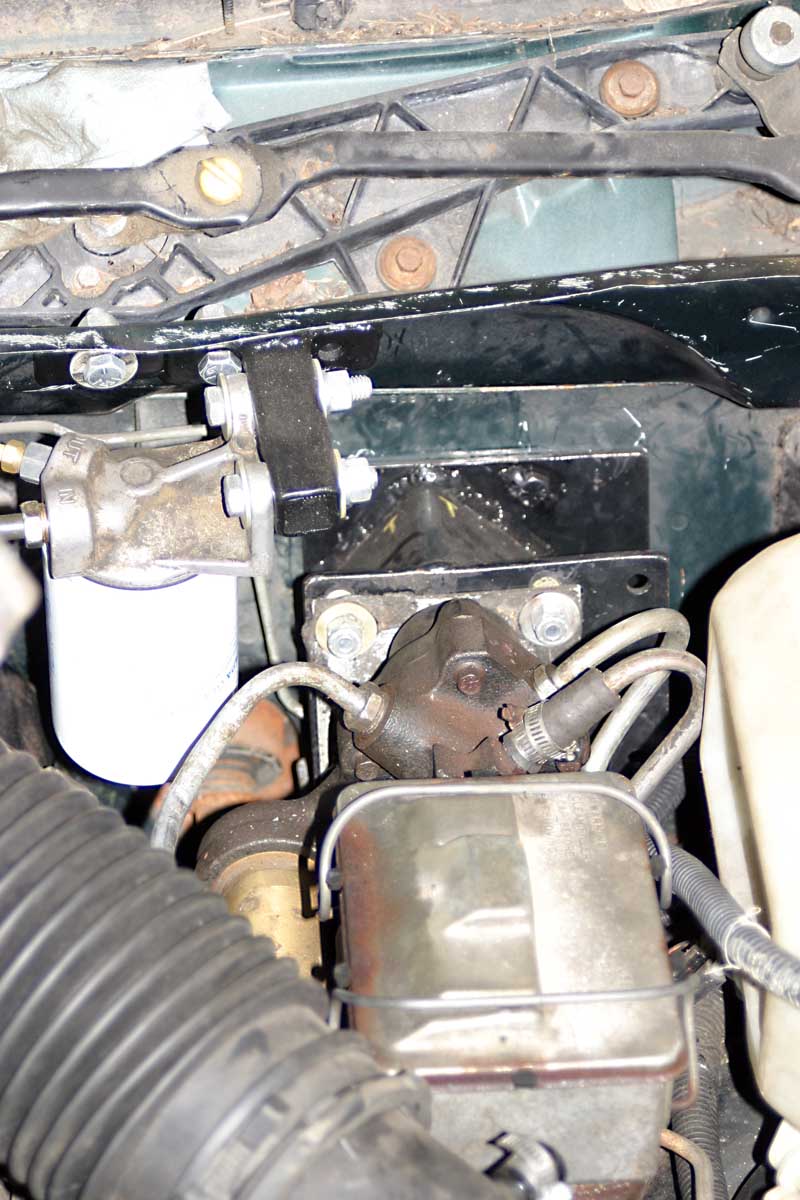
While I had the engine out I added a heat shield on the passenger side firewall. I mounted the fuel filter and fuel water separator each on the left and right sides of the firewall and ran new hard fuel lines. These lines and filters will carry the diesel fuel. See above & right photos. The coolant overflow bottle was relocated to the front of the engine bay to make room for the fuel water separator near the firewall.
I am planning at this time to use the stock radiator and see how well or not it will cool the 6.2 engine. I added some cooling holes, approximately 150 3/8" hole in the steel bumper reinforcement and another 48 1" hole in the plastic bumper. I removed the Styrofoam from the middle portion of the inner bumper. The holes will help cool the lower half of the radiator and the added transmission cooler and engine oil cooler. I added an additional transmission cooler from B&M and ran that in series with the stock Jeep transmission cooler. The coolers are stacked one in front of the other with the new cooler offset lower. The oil will run through the stock, rear, cooler first and then through the new, front cooler last. There will be no transmission oil going through the radiator. The radiator will be taxed enough with the engine heat. I also added a Derale deep pan, 2 quart extra capacity, with cooling tubes to help cool the transmission.
I also added a Perma Cool engine oil cooler in front of the radiator. I had some hydraulic lines made at the local Bumper to Bumper store in Burlington. Each hose had 90 degree fittings to go into the block and cooler. The lines were run up over the back of the engine, over the top of the intake, and around the driver side of the radiator. I had 4 hoses made, and made a connection in the engine bay over the intake of each of the two hoses for in and out. Making the 4 hoses was easier than trying to get 2 for each port and making sure the fittings faced the correct way. Each hose is covered in a kevlar sheeting to make sure they do not rub through.
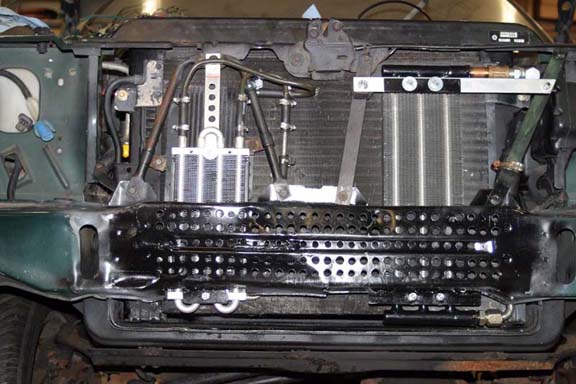
Both the engine oil cooler and additional transmission oil cooler were mounted in front of the radiator. Both coolers had flanges which brackets and mounts could be made for. A little metal was trimmed from the steel bumper to allow enough space between the coolers and the air conditioning condenser. The oil cooler is on the driver side and the extra transmission cooler is on the passenger side in the above photos. I do plan to add air conditioning in the future. There would be much more room by eliminating the air conditioning condenser.

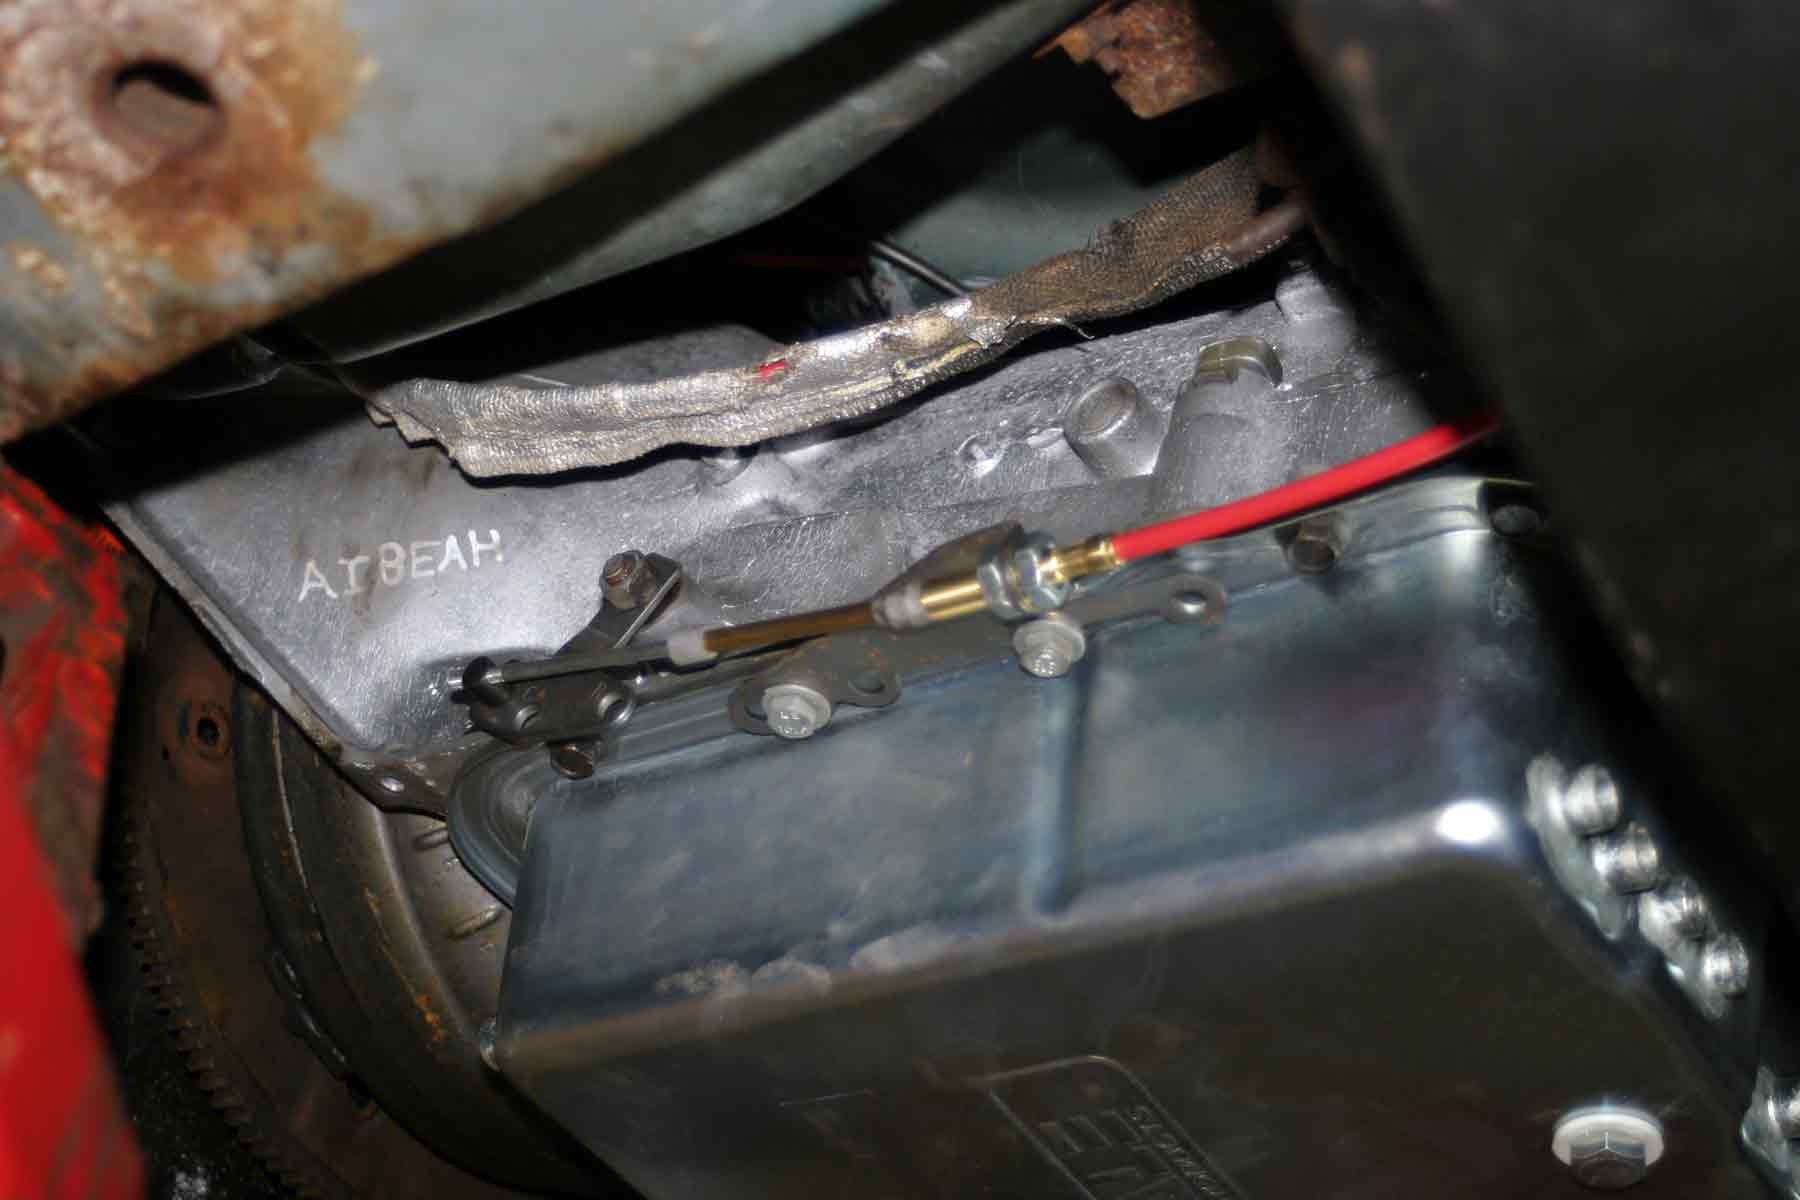
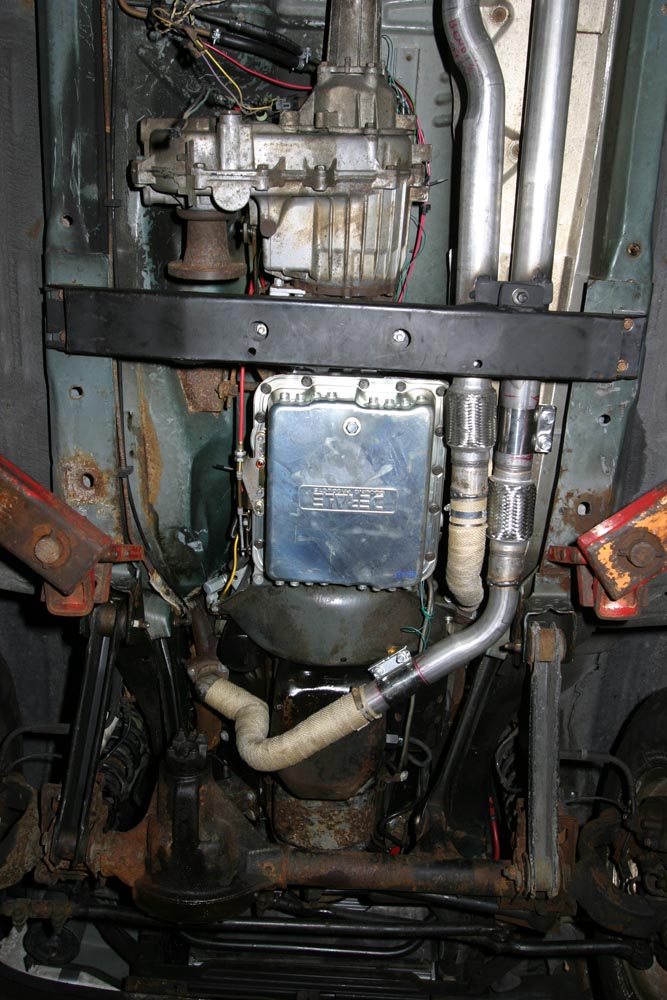
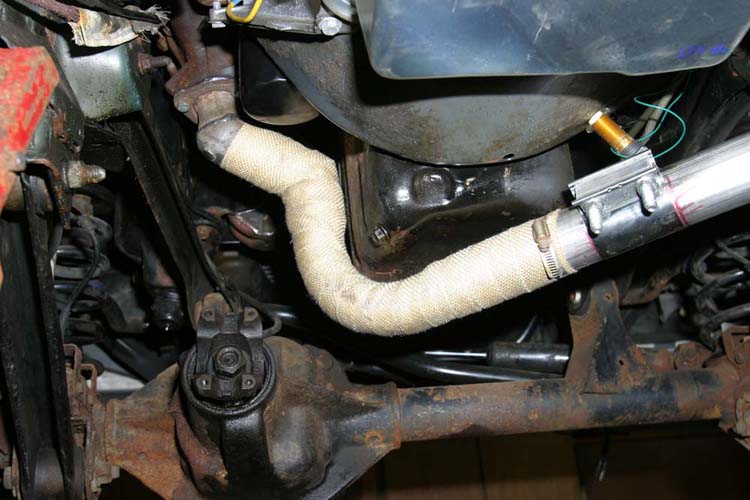
The transfer case shift linkage was fit up with very few modifications. A bracket was used from a Jeep Cherokee that bolted to the bolts that hold the transfer case and transmission together. The stock linkage from the lever and pivot was used from the Grand. I had to space the Cherokee bracket forward slightly to make the pivot holes line up. The Grand's lever works, except it is 2 detents up for two wheel drive, but it is not very intrusive.
For the transmission I ordered a 6 foot universal B&M shift cable with two threaded ends, and two ends with barrel threads to mount in a hole. I also ordered the B&M bracket for a 700R4 transmission. I had make a mount inside the occupant compartment for the cable, a piece of 2" x 2" angle worked good. The angle was secured to the floor in front of the stock shifter mount. The hole was drilled higher so it would be inline with the shifter ball joint. The stock hole is slightly below the shifter. I got a spring loaded quick release ball joint that fit the ball on the Jeep's shifter and threaded onto the shift cable. I was able to find one at a marine supply store, it took two tries to get the right size joint. The firewall grommet and heat shielding was reused. The cable was routed over the top left of the transmission and secured away from the transfer case linkage and front driveshaft.
I had to do some grinding on the shifter and trim to be able to get the transmission into first gear. The shift indicator appears to be real close to the indicated gear except for first and second gears, as the Jeep transmission was only a 3 speed. I will be adding a button to lock up the torque converter.
The below photo shows the install from overhead. I was able to use the stock airbox, which I am hoping will allow enough air to the engine. The hat on top of the engine was custom made to fit the stock intake manifold and the tube coming form the airbox. The lower radiator hose is a combination of the stock Jeep and a piece of straight 3" with a block heater installed with a bushing for the larger side.
Over the next month I will have to work on the wiring, and final running of the fuel lines from the middle of the Jeep to the top of the engine. I have already installed a new pickup line in the fuel tank and an electric lift pump from a 1993 diesel. The mechanical lift pump was in the way of the right front engine mount. I also drilled out the filler neck for the diesel fuel station nozzles.
I was able to use the stock Jeep driveshaft with the Chevrolet yoke for the rear. I bought a u-joint that fit the Jeep yoke on one side and the other side fit the Chevrolet yoke. I bought the u-joint from Elkhorn Driveshaft Company. The shaft length was not changed, it appears that it will work as is. I have not tried to fit the front driveshaft yet.
I will also have to do some brake work and install new gears in the differentials. The front differential has a bad bearing. I am planning to use a 3.07:1 gear with 215/85/R16 tires, which works our to about 1800 rpm in 3rd gear at 55mph, and 1300 rpm in OD; at 65 mph it is about 2200 in 3rd gear and 1500 in OD. The transmission has a lock up converter which I will be able to control manually.
The below photo was as of June 2008.

The above photo was as of June 2008
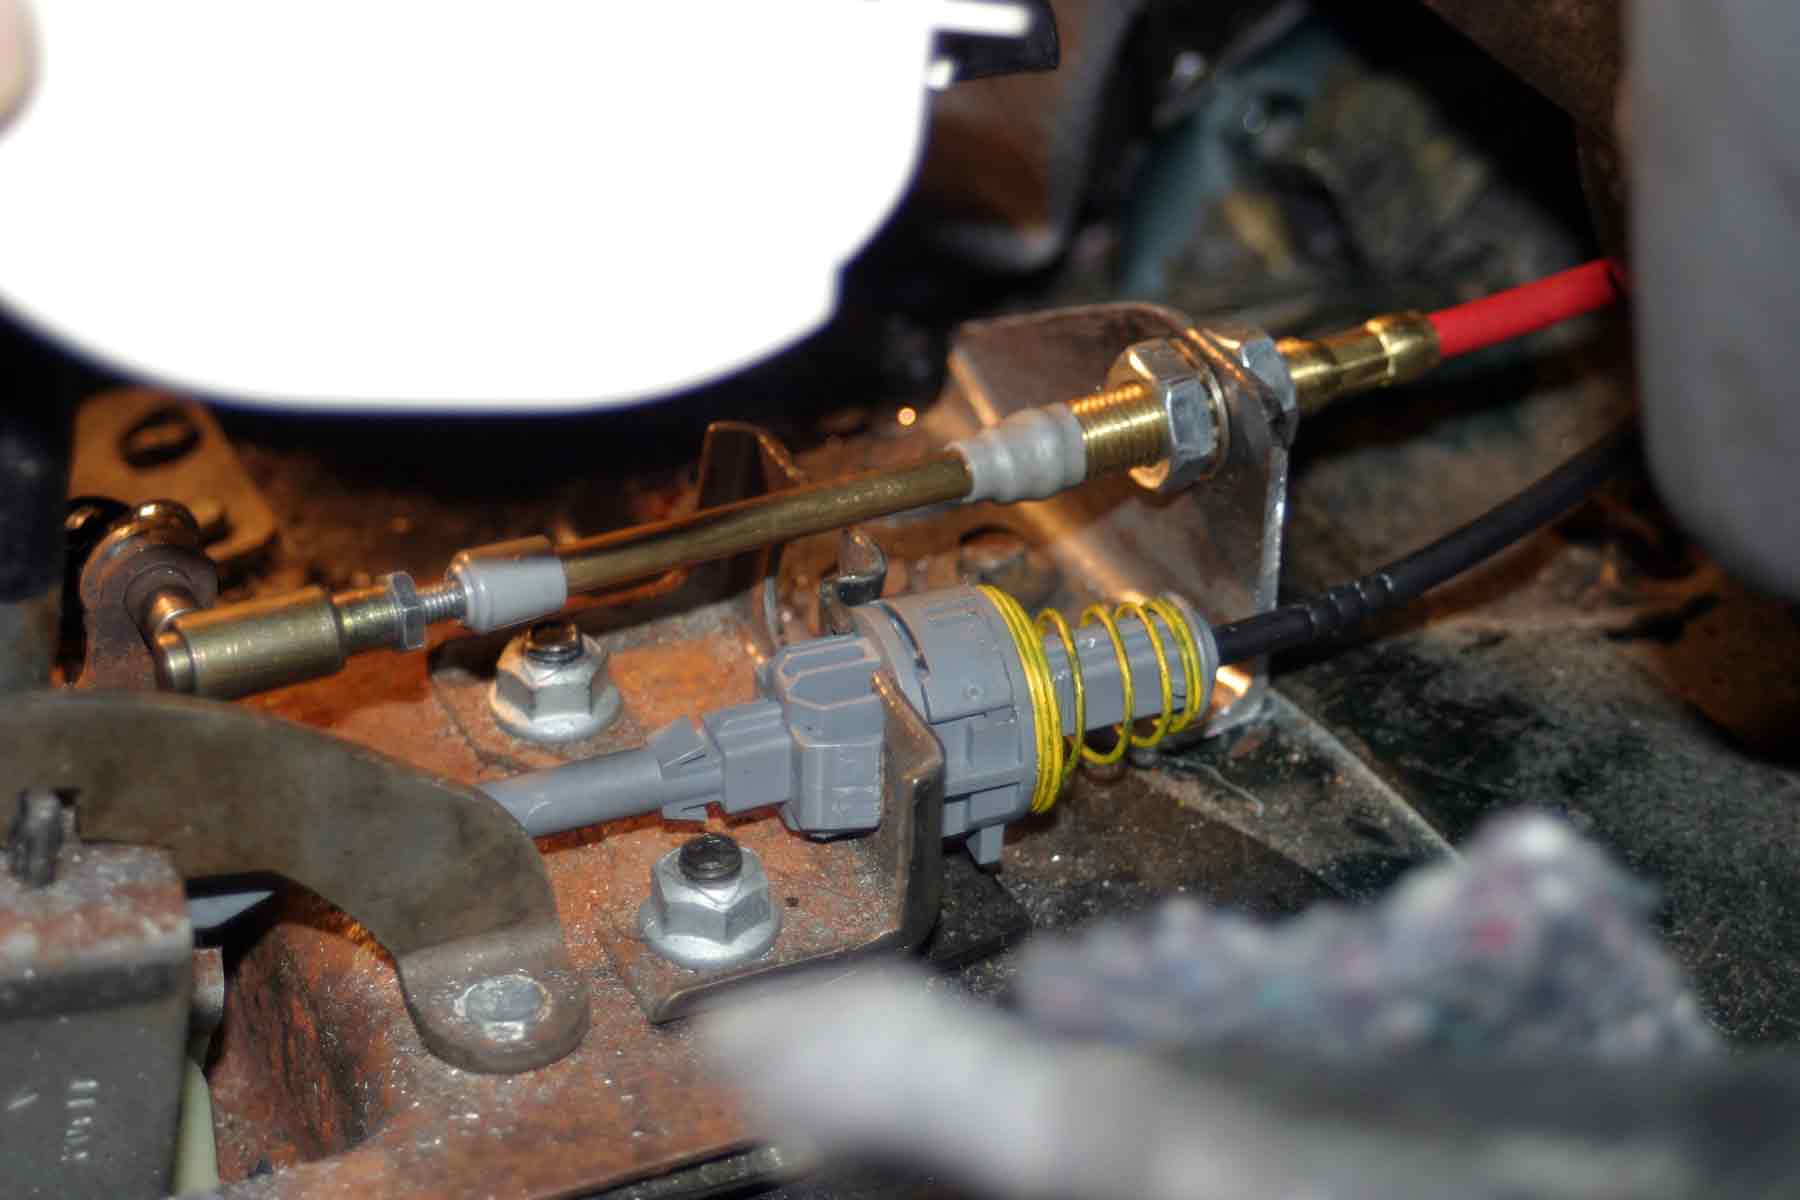
Limited time this past summer meant I did not get to spend as much time as I wanted to on the Diesel Jeep project. I installed a neutral safety switch on the transmission from Lokar. I added a crank signal sensor from Dakota Digital and will use their black box to convert the flywheel signal to the crank signal of the Jeep. Unfortuantly this did not work out as planned. Plan B will be to use a boat tach with either the Dakota Digital box or the signal off the alternator.
Tires on the vehicle are going to be 215/85/R16 mounted on a set of Ford aluminum rims. Locally I found a set of good used Firestone LT tires, which can be run at 60psi.
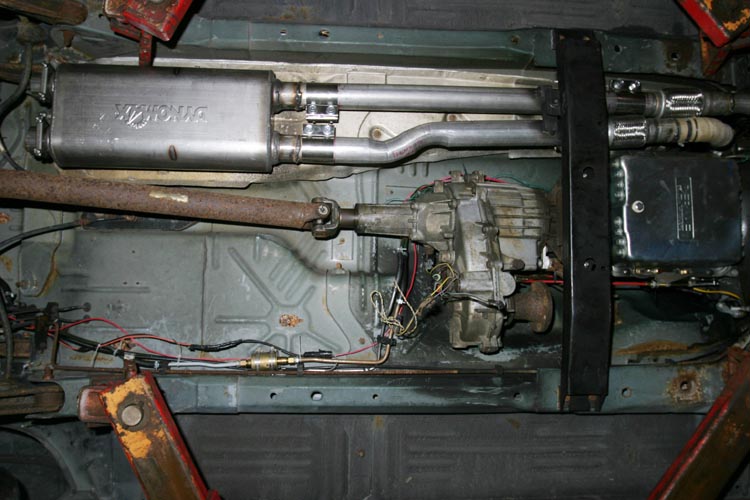
Had some time the last couple weeks to work on the ZJ. I made up an exhaust system. First I used the down pipes from the donor truck the engine and transmission came from. For the passenger side pipe I rough bent the pipe with some large bars and some cutting and tack welding. Then I took that pipe to an exhaust shop, Slades Corners Auto Supply, and had them bend me something close, which worked out better that I had expected. For the driver's side I had some tight bends to make, so I cut and welded part of the truck exhaust. Slades Corners Auto Supply made me up some 90 degree pipe which I located and welded to the top piece. The pipe is close to the oil pan and the front differential, but should be not hit except for a hard bottom out...maybe. I wrapped the exhaust with some header wrap to help reduce the heat near the engine oil pan and floor. I used band clamps and flex pipe. The band clamps make everything easier to put together and take apart as I was fabricating and for any future changes I may make. The flex pipe is so I can secure the exhaust past the front better. I put one hanger with a small flex on the crossmember and two hangers on the tailpipe side of the muffler. The pipes coming off the manifolds are 2.25" diameter and the pipes after the flex pipe are 2.5".I used a Dynomax muffler with two 2.5" inlets and outlets. There will be two tailpipes coming out the passenger side of the Jeep.
I changed out the fuel injectors last week (July 2009), wish I would have done while the engine was out, but it was not as bad as I had thought it would be. I had a diesel parts van which I took he injectors off of. The 6.2 van injectors are slightly shorter than than the truck injectors, which worked out good. They are shorter for more clearance in the vans. One of the injectors was hard to remove from the van due to clearance issues. This should take care of the rich running condition of the engine as the injectors were very dirty.
I added a glow plug control. I used a Ford solenoid and a momentary switch. I used most of the wiring from the donor truck. I would like to install a timed relay in place of the momentary switch. One side of the switch would run the timed relay and he other will be a momentary for longer glow times as needed. This will be a future add-on.
I have had the Jeep out an running on its own power just up and down the driveway. Still have a couple little things to do to get it on the road (August 2009).
Some more updates on this project. Cleaned up the wiring, with some zip ties and loom. Used a Dakota Digital signal converter to get a marine tach working and the speedometer working. Installed some relays to power the lift pump, and the shut off solenoid. Fixed the fuel level sender, had to bend the float slightly as it was hitting on the pick up line I installed in the tank.
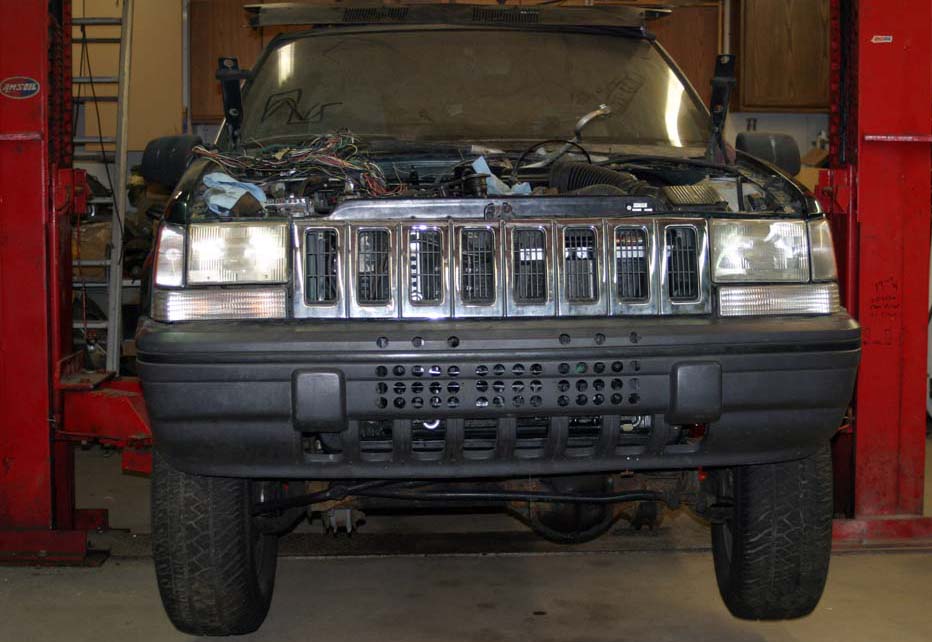
The hood is installed and does not hit anything. I thought I would have to install a slight bump to make it fit. Hopefully the accelerator cable will be OK. It appears to be the only thing touching the hood. I did have to cut the insulaton out by the fan shroud.
Need to still find a wheel to match the other 3, and some lug nuts that are all the same. Tie down the battery and make a cover. I am going to run it a bit and then change out the fuel filters. (Sept. 2009)

![]()
![]()

![]()
![]()

Site Copyright 2008 Hans W. Hauschild.
Images and text are copyright Amsoil, or Hans W. Hauschild.
Logos and Trademarks are property, copyright, or trademark of each respective company